
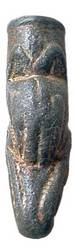
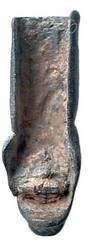
All digital cameras available today are likely to have a satisfactory resolution (Megapixel rating). The essential requirement for photographing small artefacts and coins is that they have a macro facility, or are capable of focusing to within a few centimetres of the item. In general, mobile phone cameras are not suitable for this purpose. The other piece of equipment that is absolutely essential is a tripod or other fixed camera stand. Focusing has to be very precise on close-up shots and this can only be consistently achieved with the camera fixed firmly in position. Additionally, its use ensures that the risk of camera-shake is minimised. Planning the PicturesBefore taking any photographs, consider the object itself, and in particular how many shots (up to three are allowed per item) of it will be required. Plan those shots so that each image shows a different aspect of the item, and collectively they give the viewer as complete a picture as if he were handling the actual item. Coins and jettons will require two images (obverse and reverse), many artefacts will require three, as the example shown.
For some items, flat buckles and circular weights for example, one image will be sufficient. Note that all images may be combined on a single picture using image-processing software. This method may also be useful if more than three views of the item are required. It may be necessary to support the item for some or all of the shots, and the best way of doing this is to use Blu-Tack. Always make sure that the Blu-Tack is out of sight when the picture is taken, and that all traces of it are removed from the item when the photography is completed. Because of the extremely small depth of field associated with macro-photography, measures should be taken to ensure that the distance between the nearest and furthest surfaces from the camera is kept to a minimum. When photographing a fob seal, for example, tilt the top of the handle towards the camera such that the suspension loop and the rim of the intaglio lie on the same plane. Please ensure that, when known, images of items are correctly oriented. For example, coin images should always show the head and tail sides the right way up. Preparing the Object Ensure that all loose soil is removed from the surfaces of the find before it is photographed. Immediately before taking the shot, lightly brush the surfaces to remove any dust particles.

If this is your first visit, please click the Sign Up now button to begin the process of creating your account so you can begin posting on our forums! The Sign Up process will only take up about a minute of two of your time.


User Tag List
Results 1 to 1 of 1
Thread: Photography Tips
-
30-03-2014, 01:44 PM #1Administrator


- Join Date
- Aug 2005
- Posts
- 2,109
- Total Downloaded
- 0
- Points
- 0
- Mentioned
- 0 Post(s)
- Tagged
- 0 Thread(s)
Photography Tips
It's worth taking a look at the tips on our website if you haven't already done so:
http://www.ukdfd.co.uk/pages/photography.html
http://www.ukdfd.co.uk/pages/scanning.html


 Reply With Quote
Thread Information
Users Browsing this Thread
There are currently 15 users browsing this thread. (0 members and 15 guests)
